Radiators are designed to heat your home evenly, but what happens when the radiator is hot at the top and cold at the bottom?
This can lead to uneven heating, increased energy bills, and discomfort in your home. In this blog, we'll explore why your radiator may be warm at the top and cold at the bottom, the causes behind this issue, and how to fix it.
By understanding the mechanics behind your central heating system, you can address these problems and keep your home warm and cosy.
How do radiators usually work to heat up evenly?
Radiators are an essential part of your home’s central heating system. They work by circulating hot water from your boiler through the radiator’s flow channels, heating the entire surface evenly.
The heated water travels through a double-loop system, ensuring that all radiators in your home receive hot water. This process is controlled by your thermostat and, if installed, a thermostatic radiator valve (TRV), which regulates the temperature in individual rooms.
When the heating is on, hot water enters the radiator at the top and circulates through its channels. Heat rises, and the water continues to flow through until it exits via the radiator valve inlet at the bottom. If the system is functioning properly, the radiator should heat evenly from top to bottom.
However, sometimes radiators develop cold spots, particularly at the bottom, where water may fail to circulate due to blockages.
Why is my radiator hot at the top and cold at the bottom?
If your radiator is warm at the top but cold at the bottom, it’s a sign that something is obstructing the flow of hot water in the radiator’s lower sections.
The most common culprit is radiator sludge—a build-up of dirt, rust, and limescale that accumulates over time. As this sludge settles at the bottom of the radiator, it prevents the hot water from reaching those areas, leaving them cold.
Another common cause of cold spots is trapped air. Over time, air can accumulate in the radiator, creating pockets that block the flow of hot water. When this happens, the top of the radiator remains hot while the bottom stays cold because the trapped air prevents the hot water from circulating evenly.
This issue often starts small, with the radiator taking longer to heat up. Over time, however, the build-up of central heating sludge or trapped air can worsen, leading to larger cold patches and, in severe cases, stopping the radiator from heating altogether.
What causes radiator sludge?
Radiator sludge forms when water and metal interact inside your central heating system. Most radiators are made from steel or iron, and as water circulates through the system, it reacts with these metals, forming iron oxides like rust.
These particles mix with dirt, debris, and limescale from the water, creating a thick sludge that settles at the bottom of your radiators.
This sludge blocks the radiator’s flow channels, preventing hot water from reaching the bottom half of the radiator. Over time, this can reduce the efficiency of your heating system, leading to higher energy bills and uneven heating in your home.
How to fix radiator cold spots
Fixing a radiator that’s cold at the bottom is usually a straightforward process. However, depending on the severity of the sludge build-up, you may need to try different solutions. Below are some of the most effective methods to fix radiator cold spots.

If only one radiator is cold at the bottom
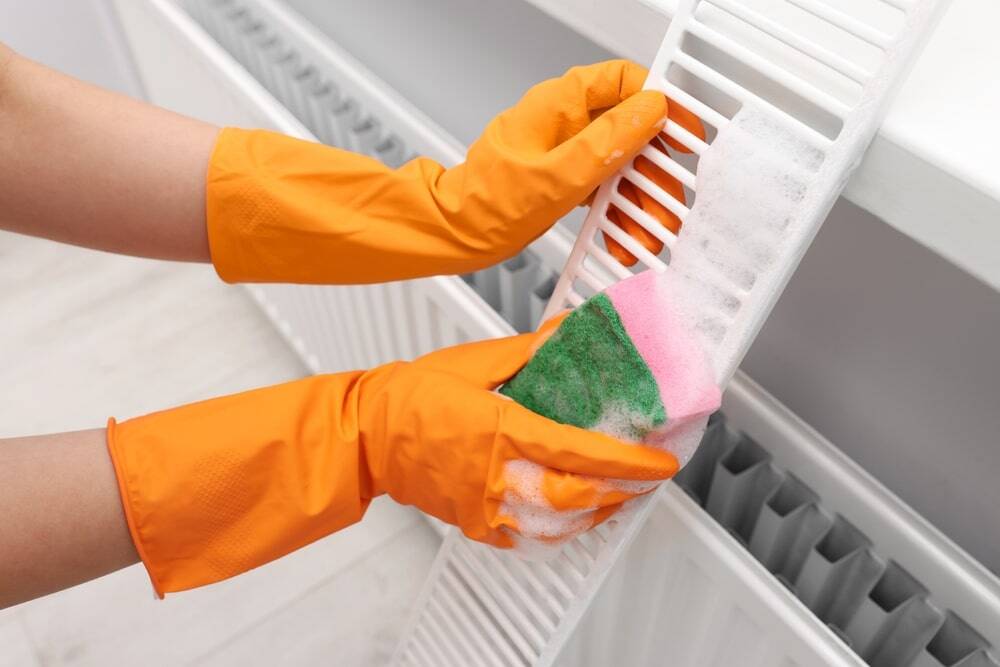
If just one radiator in your home is cold at the bottom, you may be able to resolve the issue yourself by manually cleaning it—a process known as flushing the radiator. This helps to remove central heating sludge that’s preventing hot water from flowing through the entire radiator.
Here’s how you can do it:
1. Isolate the radiator
The first step is to isolate the radiator from the rest of the central heating system. This prevents further water from entering the radiator while you work on it.
- Thermostatic radiator valve (TRV): If your radiator has a TRV (the valve with numbered settings), turn it all the way down to 0 to stop the flow of water.
- Lockshield valve: On the opposite side of the radiator, you’ll find the lockshield valve, typically covered with a plastic cap. Using a spanner, turn the lockshield valve to close it. You may only need to turn it a quarter or half a turn. Make a note of how much you turned it, as you’ll need to return it to this position later.
- Radiators without a TRV: If your radiator doesn’t have a TRV, turn both the lockshield and the manual valve off using a spanner. Allow at least an hour for the water inside the radiator to cool down before proceeding to avoid any risk of hot water spilling out.
2. Prepare for leaking water
Before you begin draining the radiator, you’ll need to prepare for leaking water.
- Grab containers: Have containers or buckets ready to catch any water that escapes during the draining process. A radiator can hold quite a bit of water, so make sure your containers are large enough.
- Protect the floor: Place old towels or rags beneath the radiator’s connector nuts to catch any spills and prevent damage to your flooring.
- Loosen the nut: Using a spanner, gently loosen the nut that connects the radiator to the valve. At this point, you should expect only a small amount of water to drip out.
3. Open the bleed valve
Now that you’ve loosened the connector nuts, it’s time to open the bleed valve. This step allows air into the system, helping the water flow out more easily.
- Bleed key: Use a radiator bleed key to open the bleed valve located at the top of the radiator.
- Letting air in: Normally, you use the bleed valve to release trapped air, but in this case, you’ll be letting air in, which will cause water to pour out more freely from the loosened nuts.
4. Remove and clean the radiator
Once the water has stopped draining, you can disconnect the radiator and remove it from its bracket for cleaning.
- Disconnect the valves: Completely undo the connector nuts and detach the radiator from the valves. Be careful not to undo the valves completely, as this could cause the entire system to empty.
- Take the radiator outside: Take the radiator outdoors, where you’ll be able to flush it thoroughly without worrying about mess.
- Attach a hose: Connect a hose to one of the valve inlets on the radiator. Turn the water on and flush it through the radiator, allowing the water to exit from the opposite inlet. This should wash out the sludge, dirt, and grime that have accumulated inside.
- Dislodge stubborn sludge: If the water doesn’t run clear immediately, use a rubber hammer to gently tap along the length of the radiator. This will help dislodge any stubborn sludge.
- Flush again: Once you’ve tapped the radiator, reconnect the hose to the other valve inlet and repeat the flushing process. Continue flushing until the water running through the radiator is clear.
5. Place your radiator back in its brackets
After you’ve finished cleaning the radiator, it’s time to put it back in place.
- Replace the radiator: Carefully lift the radiator back onto its wall brackets, making sure the connector nuts are securely fastened to the valves.
- Turn the valves back on: Using your spanner, reopen the lockshield valve by the same amount you turned it earlier. If your radiator has a TRV, turn it back to the desired setting.
6. Check the system
Now that the radiator is back in place, you’ll need to refill it with water and check that it’s heating up properly.
- Bleed the radiator: Once the radiator is refilled, you’ll need to bleed it again to remove any trapped air that may have entered during the cleaning process. Use your bleed key to release any air pockets until water starts flowing out.
- Re-pressurise the system (if applicable): If your central heating system is sealed or pressurised, you may need to top up the water pressure to balance the system after removing a radiator.
- Test the radiator: Turn your heating back on and allow the radiator to heat up for 20–30 minutes. Check that the bottom of the radiator is now as warm as the top, ensuring that the entire surface heats evenly.
If the radiator heats evenly and no longer has cold spots at the bottom, you’ve successfully resolved the problem.
If more than one radiator is cold at the bottom
If multiple or all the radiators in your home are cold at the bottom, the problem could be more widespread, potentially indicating a sludge build-up throughout your entire central heating system. In such cases, a power flush may be required.
A power flush uses specialised equipment to forcefully blast water and chemicals through your system, dislodging and removing sludge, dirt, and debris. This process should always be done by a qualified heating engineer to ensure your system is thoroughly cleaned.

However, trapped air could also be causing cold spots. In this situation, you may simply need to bleed your radiators to release the air pockets that are preventing hot water from circulating evenly. Bleeding your radiators is a quick, DIY-friendly fix. For a step-by-step guide on how to do this yourself, check out our full guide on how to bleed radiators.
How to prevent radiator cold spots in future
Preventing radiator sludge build-up is key to avoiding cold spots at the bottom of your radiators. Here are a few preventative measures you can take:
Magnetic filter
Install a magnetic filter in your boiler system to trap metal particles before they can accumulate in your radiators.
Scale reducer
Use a scale reducer to prevent limescale from building up in your heating system, reducing the likelihood of sludge formation.
Central heating inhibitor
A central heating inhibitor is a chemical solution that breaks down sludge and prevents it from forming. Adding an inhibitor to your system will help keep it running efficiently.
When to call in a JustFix professional
If you’ve tried flushing your radiator and are still experiencing cold spots or uneven heating, it may be time to call in a professional. The issue could be more complicated than just sludge, and a heating engineer can assess your central heating system for any underlying problems.

Get in touch with a qualified heating professional at JustFix to help fix your radiators. Our team of engineers works nationwide, providing expert service at fair, fixed prices.
When you book with JustFix, we’ll match you with a local heating and gas engineer to get your radiators back in working order at a time that suits you.
For more help when it comes to your heating, check out our guides on helpful topics like how to fix a leaking radiator and what to do when you have hot water but no heating.