Leaking radiators can be frustrating, especially during colder months when your central heating system is working its hardest. Fortunately, many radiator leaks can be fixed without too much trouble, saving you time and money.
This blog post will help you understand why your radiator is leaking, how to fix it, and when it might be time to call a professional.
Why is my radiator leaking water?
Understanding why your radiator is leaking is the first step in fixing the problem. Radiator leaks can occur for several reasons, and identifying the root cause is crucial for a successful repair.
Here are some common reasons why radiators leak:
Damaged or loose radiator valves
Radiator valves play a critical role in controlling the flow of water through your heating system. Over time, the valve components can become loose or worn out, leading to water leaks.
A leaky radiator valve is a common issue and can usually be fixed by tightening the valve or replacing a faulty valve. In some cases, the valve may have been improperly installed, leading to leaks from the start.
Rusted or corroded radiator body
Radiators, like any metal object, can rust over time, especially if they are very old radiators or if the water in your heating system is not treated with corrosion inhibitors.
Rust can create small holes or pinhole leaks in the radiator body, allowing water to escape. If your radiator is leaking water that appears rusty, corrosion is likely the culprit.
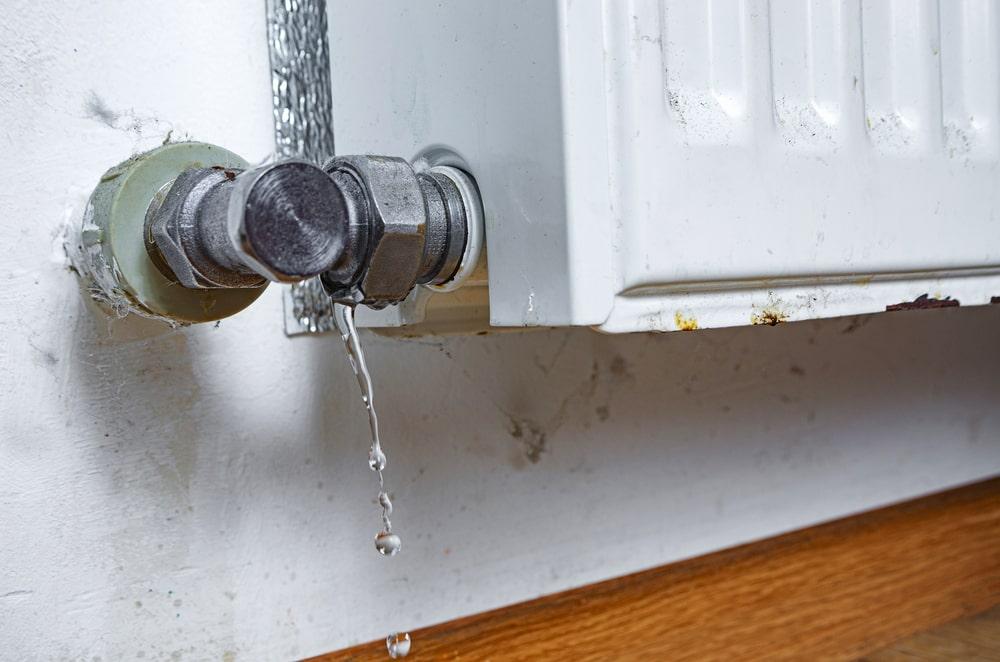
Leaking radiator pipe joints
Another common source of leaks is the joints where your radiator unit connects to the water pipes. These leaks can be caused by a loose or damaged radiator valve coupling nut or a leaking valve tail.
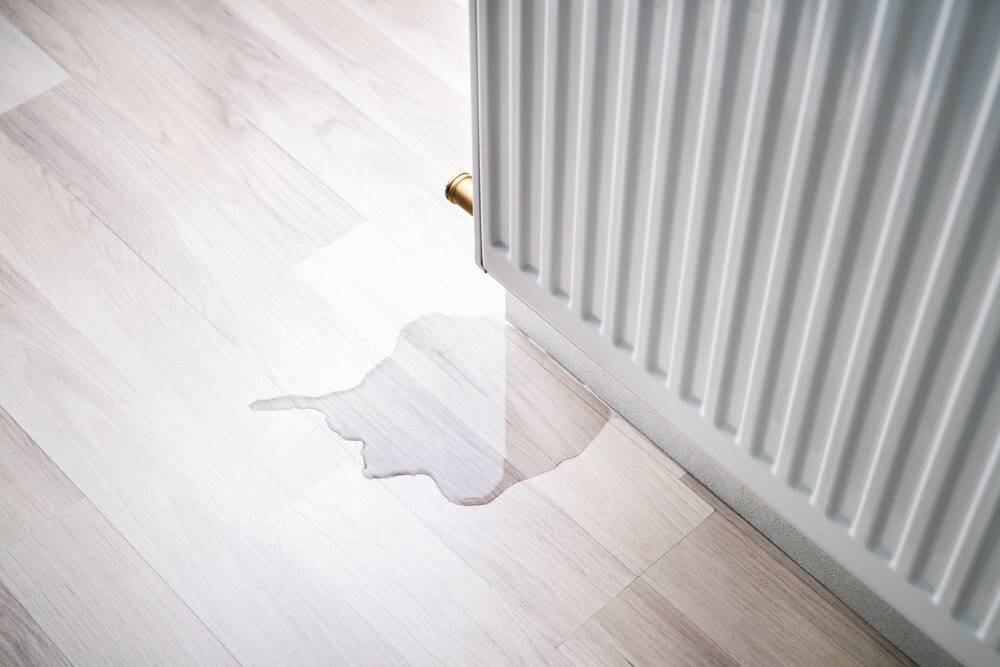
If you notice water pooling around the base of your radiator, it could indicate a leaking pipe joint.
How to fix a radiator leak
Once you’ve identified the cause of your leaking radiator, you can start the repair process. While some repairs are simple and can be done by most homeowners, others may require professional help.
Below, we’ll walk you through the basic steps to fix common radiator leaks.
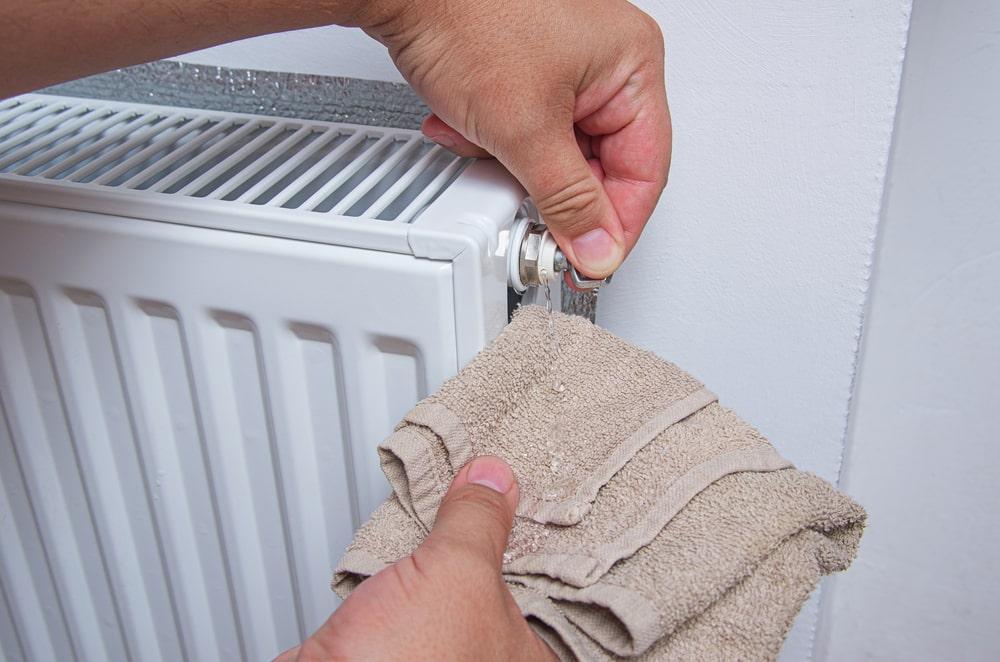
Find the source of the radiator leak
Before you can fix a leaking radiator, you need to find out exactly where the water is coming from. Here’s how:
- Turn off the heating system: Start by turning off your central heating system and allowing the radiator to cool down completely. This is important to avoid burns and to ensure you can safely work on the radiator.
- Dry the radiator: Use a towel or a dry paper towel to wipe down the entire radiator. Pay close attention to areas where leaks are common, such as the radiator valves, pipe joints, and the body of the radiator itself.
- Check for leaks: After drying the radiator, carefully inspect it for any signs of moisture. You can run a dry paper towel over different parts of the radiator to see if it picks up any water. If the paper towel gets wet, you’ve likely found the source of the leak.
Drain the radiator
If your radiator leak requires you to replace parts or access internal components, you’ll need to drain the radiator. Here’s how to do it:
- Turn off the radiator valves: Close the control valve (usually a thermostatic valve) and the lockshield valve on either side of the radiator. This will stop water from flowing into the radiator.
- Prepare to drain: Place a large container or bucket underneath the radiator to catch the water. You may also want to lay down towels or sheets to protect your floor.
- Open the bleed valve: Use a radiator key to open the bleed valve, which will allow air to enter the radiator and water to drain out. Be sure to open the bleed valve slowly to control the flow of water.
- Drain the water: Once the bleed valve is open, water will begin to drain from the radiator. Tilt the radiator slightly if needed to help drain all the water. Make sure the radiator is completely empty before moving on to the next step.
Fixing a pinhole leak in the radiator body
If your radiator leak is caused by small holes in the radiator body (a pinhole leak), you can temporarily fix it with a leak sealer until you can replace the radiator.
- Apply leak sealer: If you have a central heating system, you can add a leak sealer directly into the system. This sealer will circulate through the system and seal any small holes from the inside. For freestanding radiators, you’ll need to apply an epoxy sealing solution directly to the hole.
- Check for leaks: After applying the sealer, turn your heating system back on and check for leaks. Keep in mind that this is only a temporary fix, and you should plan to replace the radiator with a new radiator as soon as possible.
Fixing a faulty radiator valve
If you have a leaking radiator valve, here’s how you can fix it:
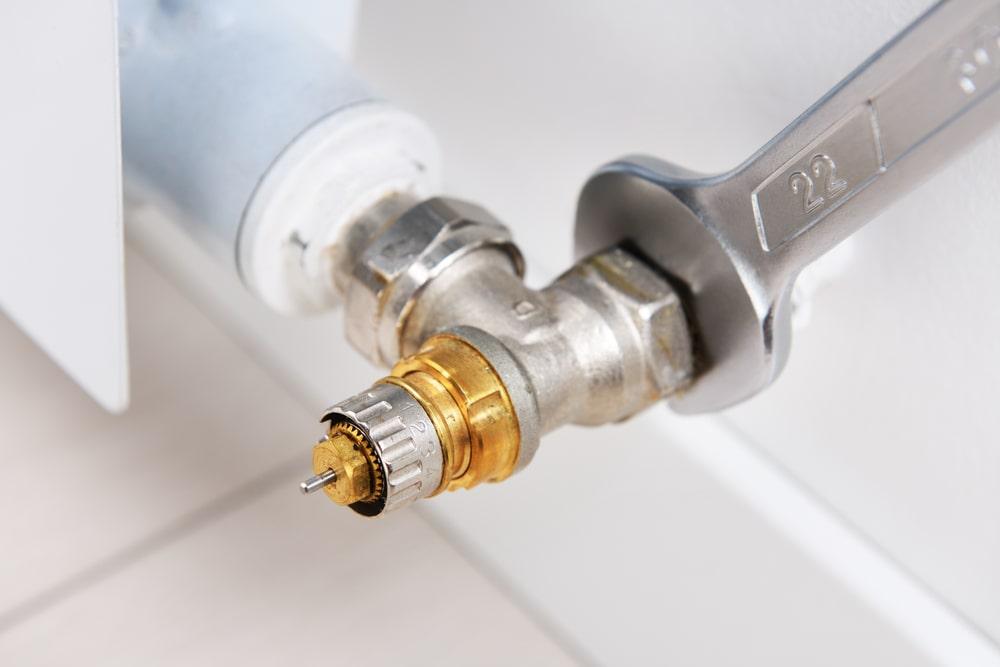
- Tighten the gland nut: If the leak is coming from the gland nut around the valve shaft (spindle), use an adjustable spanner to tighten it. Be careful not to overtighten, as this could damage the valve.
- Replace the valve packing: If tightening the gland nut doesn’t stop the leak, the problem might be with the spindle packing. To fix this, remove the gland nut and wrap PTFE tape around the spindle. Then, replace the gland nut and tighten it.
- Replace the existing valve if necessary: If the valve is still leaking after these steps, you may need to replace it entirely. This involves draining the radiator, removing the old valve, and installing a new one.
Fixing a leaking valve tail or radiator pipe joint
If your radiator is leaking at the valve tail or pipe joint, follow these steps to fix it:
- Drain the radiator: As with other repairs, start by draining the radiator and opening the bleed valve to remove any water.
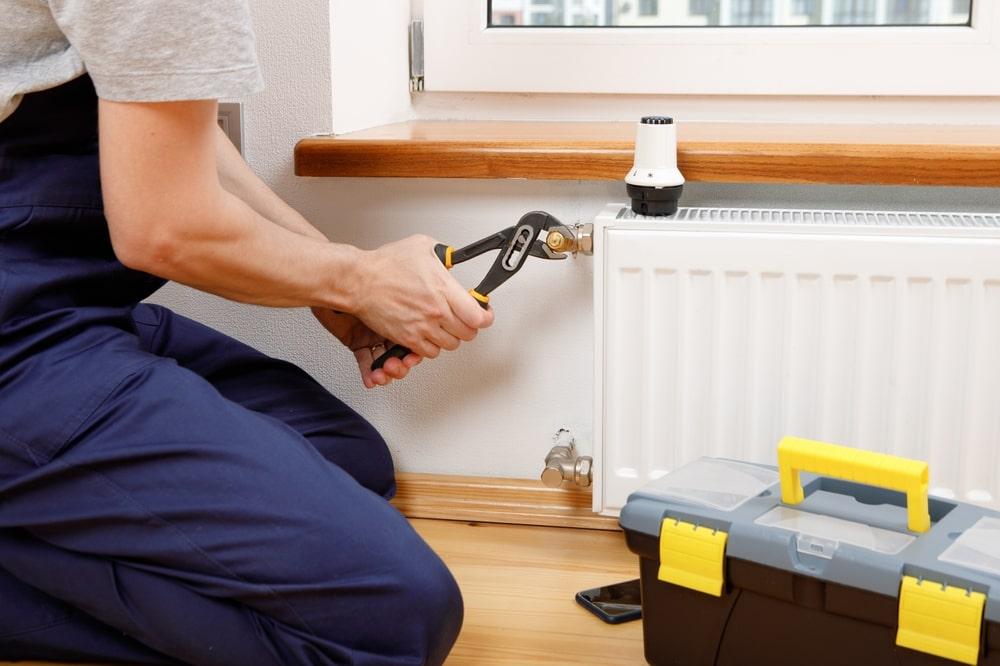
- Remove the valve coupling nut: Use a spanner to loosen the radiator valve coupling nut at the leak site. If the leak is coming from the valve tail, you’ll need to remove this as well.
- Apply PTFE tape: Wrap PTFE tape around the thread of the valve tail or pipe joint to create a watertight seal. Make sure to wrap the tape in the same direction as the thread to ensure a good seal.
- Reassemble and tighten: Reattach the valve coupling nut and tighten it securely with a spanner. Be careful not to overtighten, as this could cause further leaks.
Turn the radiators on and double check for leaks
After completing your repairs, it's important to ensure everything is functioning properly. Start by turning your heating system back on and allowing the radiators to heat up fully.
As the radiator warms, carefully inspect the area where the leak was originally found. Pay close attention to the radiator valve, valve tail, and any joints where the radiator connects to the pipework.
Check for any signs of water leaking, dripping, or moisture around the repaired areas. Even small leaks can indicate that the repair wasn't entirely successful.
If you notice any water leaks, you may need to tighten the connections further or reapply PTFE tape to ensure a watertight seal.
When to call in a JustFix professional
While some radiator leaks can be fixed with basic DIY skills, there are times when it’s best to call in the experts. If you’ve tried to repair the leak but it keeps coming back, or if the leak is hard to reach, like behind walls or under floorboards, it’s time to contact a qualified heating and gas engineer at JustFix.
We pride ourselves on providing top-notch service at affordable prices. Whether you’re dealing with multiple leaks, suspect internal corrosion, or simply want the peace of mind that comes with professional help, our nationwide team of Fixers is ready to assist.
Book online, and we'll connect you with a qualified local engineer who can restore your heating system’s efficiency and reliability—at a time that suits you.

If you need help with any other issues, check out our blog for more helpful guides, such as how to bleed radiators and how to balance radiators.
FAQs
Is it an emergency if my radiator is leaking?
A leaking radiator is not usually an emergency, but it’s important to address the issue as soon as possible. Small leaks can lead to larger problems over time, including water damage to your home and a decrease in heating efficiency.
If the leak is significant or you notice water pooling on the floor, it’s best to turn off your heating system and contact a professional.
Can I fix a leaking radiator myself?
Yes, many radiator leaks can be fixed by homeowners with basic tools and a bit of DIY knowledge. Common repairs, such as tightening a loose radiator valve or applying PTFE tape to a leaking pipe joint, are relatively straightforward.
However, if the leak is due to internal corrosion or if you’re uncomfortable making the repair yourself, it’s a good idea to call in a professional.
When should you replace a leaking radiator?
While many radiator leaks can be repaired, there are situations where it may be more practical or necessary to replace the radiator entirely. If your radiator is over ten years old, has multiple leaks, or shows significant signs of corrosion, replacement might be the best option.
Corroded radiators, especially those leaking rust-filled water, often indicate internal damage that could lead to further problems down the line.
Additionally, if you find yourself frequently fixing leaks or if the radiator’s performance has noticeably declined—such as uneven heating or poor heating efficiency—replacing the radiator could improve your overall heating system's efficiency and reliability. A new radiator not only eliminates the ongoing issues but can also enhance the aesthetic of your home and potentially reduce your heating bills.