Looking to spruce up your home with a lick of paint? Painting a wall is pretty straightforward, and you don’t need much equipment to get started. However, uneven patches, streaky paint, and messy edges can turn this simple job into a DIY SOS.
But there’s no need to panic! In this guide, we’ll teach you how to paint a wall like a pro. From choosing the right tools to prepping your wall and applying paint just like the decorators, we’ll share our best tips and tricks for a flawless finish every time!
We’ll cover:
What you need for painting walls
How to prepare a wall for painting
How to paint a wall: Step-by-step instructions
Find a professional decorator with JustFix
What you need for painting walls
Before you begin prepping or painting your wall, gather your supplies! Strictly speaking, all you need is a pot of paint and something to apply it with. However, we’d recommend some extra tools for a professional finish.
To prepare your wall, you’ll need:
- A drop cloth or plastic sheeting to protect your floor
- A ladder for hard-to-reach places
- Painter’s tape or masking tape to keep things neat
- Filler and sealant to fix any cracks or gaps in the wall
- Sandpaper and a scraper to smooth it out
- Sugar soap to clean the walls
- A good primer to make sure the paint sits well
And to paint your wall, you’ll need:
- High-quality paint that’s suitable for the room (we’ll come back to this)
- A good paint roller
- Quality paintbrushes
- A paint tray
How to choose the right paint
Picking the right paint for your wall is essential for a professional finish that will last forever. Latex-based paints are the most common and typically the best option for interior walls. They dry quickly, are easy to clean, and are available in various colours.
If you’re painting an area prone to spills and splashes, like a kitchen or bathroom, a grease-resistant satin paint will be durable and easy to clean. Meanwhile, a matte or eggshell finish suits bedrooms and living rooms.
How to prepare a wall for painting
As our teachers always said, failing to prepare is preparing to fail! When it comes to painting like a pro, preparation is key. Taking some extra time to create an even canvas to paint on will ensure a smooth, lasting finish.
Follow these steps to prepare your space and walls properly:
- Clear the area: Move furniture out of the way or cover it with drop cloths. Then, protect your carpet or flooring by laying down plastic sheets or drop cloths. Make sure you can easily access every wall you want to paint.
- Create a smooth surface: Use filler to fill in any cracks or holes in the wall. Once it's dry, sand down the area and seal it with sealant. Use sandpaper and a scraper to even the surface if the wall is flaky, bumpy, or otherwise uneven. If your previous paint had a satin or gloss finish, sandpaper the whole wall to create a surface the new paint can stick to.
- Clean the wall: Wipe down your wall with a mild solution of sugar soap/dish soap mixed with water. Gently scrub the wall with a clean sponge and pay extra attention to visibly dirty areas. If there is any mould, follow the steps in our how to get rid of mould guide before you go any further.
- Add your tape: Use painter’s tape or masking tape to protect areas you don’t want primer or paint to get on. For example, line where the edges meet with tape if you're painting a feature wall. Tape over doorframes, window frames, door handles, ceilings, and skirting boards.
- Apply a primer: A primer will help your paint stick, provide a better finish, and reduce the amount of paint you need to apply overall. It’s especially important to use one if you’re painting a light colour over a darker colour. Work from the top to apply your primer evenly with a roller, and make sure it dries completely before you begin painting.
We know what you’re thinking: all this work before you can even start? It sounds like a lot, but proper preparation is the secret to perfectly painted walls.
Not fancying the graft? Our decorators can do the hard work for you! Find and book a local painter to guarantee wonderful walls every time!

How to paint a wall: Step-by-step instructions
Now you’ve prepped and primed your wall, it’s time to get painting! Follow these instructions for a professional-looking finish.
- Prepare your paint: Tip your paint into your paint tray and ensure your roller and brushes are on hand.
- Tape the edges: We'll forgive you if you’ve skipped a few preparatory steps! Just line the edges around your wall with painter’s tape if you haven’t already done so. Apply it around windows, doorframes, and the ceiling. Press it firmly to prevent paint from seeping and create sharp, clean lines.
- Cut in: Use your brush to paint along the edges of a wall where the roller can’t comfortably reach. This technique is called ‘cutting in’. Work in small sections, and be careful not to overload your brush.
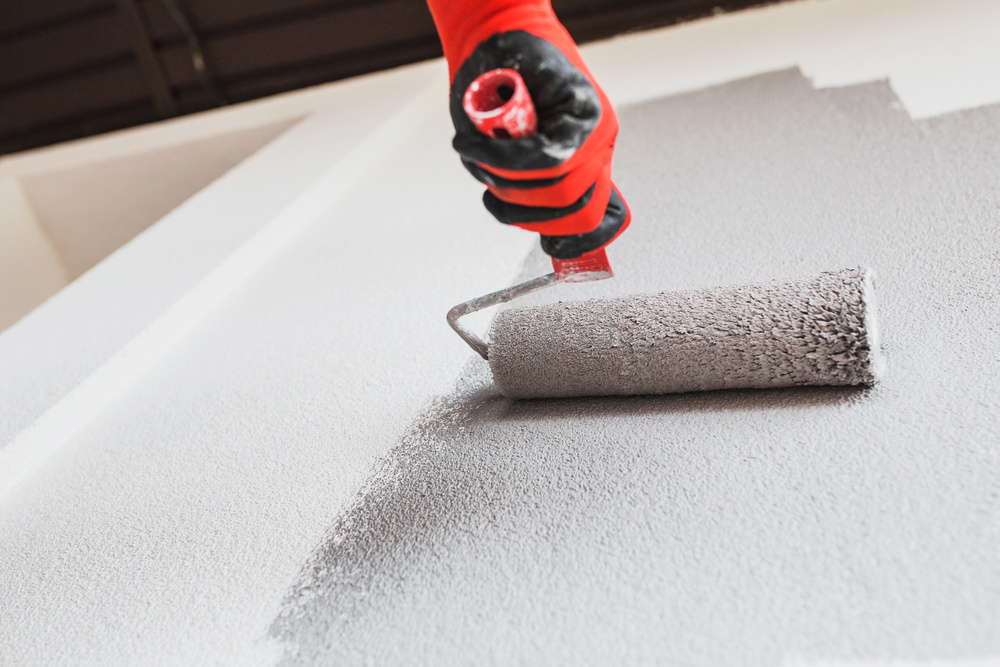
- Roll on the paint: Roll your roller in the tray and pick up a generous amount of paint. Start at the top left or right, and work your way down and across in ‘W’ and ‘M’ patterns. This helps to distribute the paint evenly and reduces streaks.
- Wait for the paint to dry: Put your feet up and take a well-deserved break while you wait for the first layer to dry. Depending on which type you use, this can take anywhere from an hour to a day.
- Apply a second coat: Sometimes, a wall can look great after just one coat. However, for full coverage, you’ll usually need a second coat. Use the same technique as before to apply the paint. Occasionally, you might need to apply further layers, but be cautious not to paint over the same spot more than you need to, as this can cause streaking and an uneven texture.
- Remove the tape: Once the paint has dried to the touch, gently remove the tape. Pull it back at a 45-degree angle to reveal clean lines. Then, if necessary, use a small brush to touch up any areas where the paint may have bled.
Et voila! Pack away your tools, step back, and admire your handiwork. You should be left with a perfectly painted wall that looks like a million dollars without costing it! With a bit of time and effort, it's easy to paint a wall like a pro.
Find a professional decorator with JustFix
With our guide and a little elbow grease, anyone can paint like a pro! However, all the prepping, priming, and painting takes time. If you’d rather spend your weekend having some downtime, we don’t blame you! Why not find and book a professional decorator to take over?
Here at JustFix, we have a network of experienced painters and decorators who can see to your washed-out walls effectively and efficiently! Simply download our app or use our website to tell us about the job, and we’ll match you up with a local Fixer who can get it done. Choose a time and date that works for you, and we’ll provide a fixed hourly rate for the work so you can be sure of no nasty streaks once the paint’s dried!

FAQs
How do you paint a newly plastered wall?
Firstly, make sure the plaster has dried completely. Then, before painting the wall, you’ll need to apply a mist coat. This acts like a primer and helps the paint stick to the wall properly. Apply your mist coat with a roller and let it dry completely before you paint the wall.
Can you paint a radiator with wall paint?
Most wall paints aren’t designed to withstand the heat of a radiator. You can paint a radiator with wall paint, but it’ll likely crack and peel over time. Instead, opt for a heat-resistant radiator paint for the best result.
How many coats of paint do you apply to a wall?
Most walls require two coats of paint for full, even coverage. However, this can vary depending on the quality of the paint, whether you’ve used a primer, and the original colour you’re painting over.
Do you have to prime a wall before painting?
You don’t have to prime a wall, but we recommend it for a professional finish. If you’re painting over a dark or bright colour with a lighter one, if the wall is stained or uneven in texture, or if the wall is freshly plastered, you’ll need to prime it for best results. However, for painting a clean, even wall in a similar colour, you can probably skip this step.