Dimmer switches can be a great solution if you’re looking to create the perfect lighting ambience in your home. Not only do dimmer switches allow you to control the brightness of your lights, but they also help reduce energy consumption and prolong the life of your light bulbs.
In this guide, we explore the benefits of a dimmer switch and teach you how to install one in your home with step-by-step instructions. We’ll also answer your FAQs and help you decide when it’s best to find and book a local electrician.
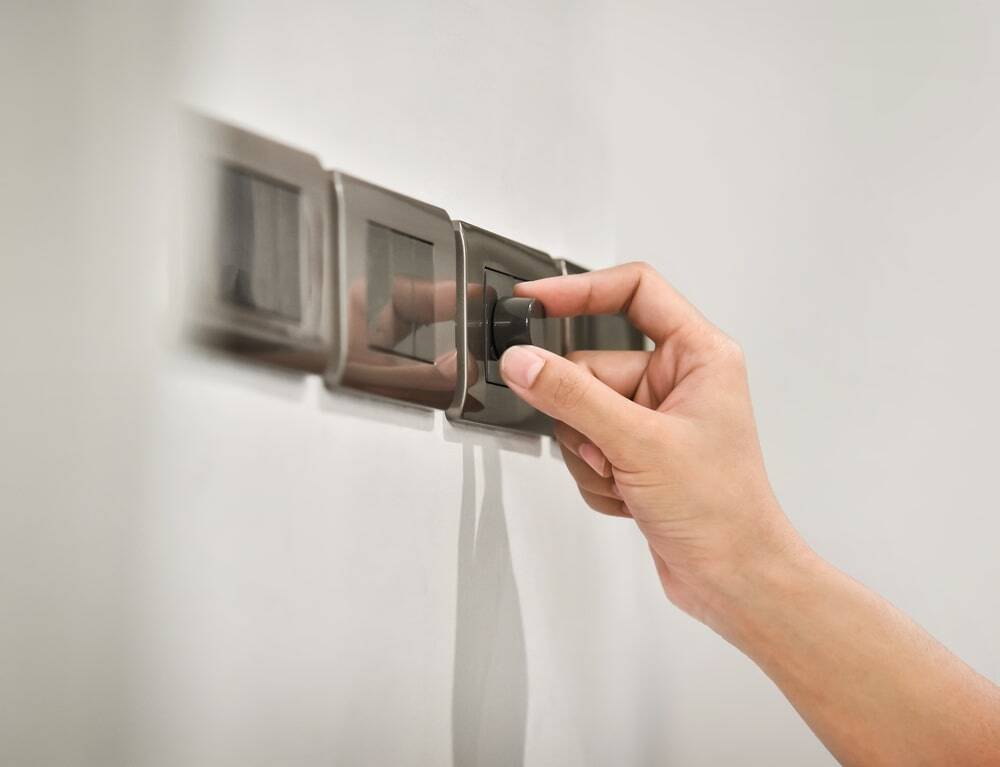
Ready to make the (dimmer) switch? Keep reading to learn how to install one! This guide covers:
What is a dimmer switch?
What are the benefits of a dimmer switch?
How to install a dimmer switch
When to call in a JustFix professional
FAQs about dimmer switches
What is a dimmer switch?
A dimmer switch is a device that allows you to adjust the brightness of a light fixture. Unlike a standard on/off switch, a dimmer gives you control over how much electricity flows to the light bulb and how bright the light is.
Dimmer switches work with various types of bulbs, including LED, halogen, and incandescent. However, it’s important to check compatibility with your bulbs and light fittings before installation.
What are the benefits of a dimmer switch?
Dimmer switches offer several advantages, both aesthetically and economically. Here are a few benefits of a dimmer switch:
- Energy efficiency: When dimmed, a dimmer switch uses less energy, reducing the electricity sent to the bulb. Over time, this can help lower your electricity bills.
- Extended bulb lifespan: Lightbulbs tend to last longer when they’re not operating at full brightness. As a result, a dimmer switch can extend your bulb’s lifespan if you often have the light dimmed.
- Aesthetic appeal: Dimmer switches allow you to change a room’s ambience, enhancing its aesthetic appeal. You can use soft, dim light for cosy relaxation or turn the dimmer switch up when you need bright light for reading or cleaning.
How to install a dimmer switch
Installing a dimmer switch is a manageable project you can carry out yourself. However, it does involve working with electrical wiring, so if you’re unsure you should contact a professional electrician.

Working with electricity can be dangerous if not done correctly. A qualified electrician will be experienced in installing dimmer switches, so they’ll be able to carry out the job safely and effectively.
If you have prior experience working with electrical wiring and are confident in your abilities, you can install a dimmer switch at home. Here’s how!
What you’ll need
Before you start, gather your tools and materials. You’ll need:
- A dimmer switch that’s compatible with your bulb
- A screwdriver
- A voltage tester
- Electrical tape
- The manufacturer’s installation instructions for the dimmer switch

Step-by-step installation guide
Step 1: Turn off the power
The first and most important step is to turn off the power. This is crucial to ensure your safety as you work with electricity. Locate your home’s circuit breaker or fuse box and turn off the power to the room where you’ll be installing the dimmer switch.
Usually, there’ll be switches labelled according to room. If it isn’t clear which switch you need to turn off, flip the main switch, which will turn everything off.
As an extra safety precaution, you could use a lock-off device or padlock, especially if somebody else is in the house. This signals to others that you’re working on the switch, so you won’t risk someone turning the power back on unknowingly.
Step 2: Remove the switch
Use a screwdriver to remove the faceplate from the existing switch and gently pull it out of the wall to expose the wiring.
Step 3: Test the current
Use an approved voltage tester to confirm that no electricity is flowing to the switch. Then, use the probes to touch each of the terminals (e.g., earth-to-terminal and terminal-to-terminal) on the existing switch to check it’s safe to work with.
If no light illuminates on the voltage tester, the circuit is isolated, and it’s safe to proceed.
Step 4: Identify the wires and terminals
Before connecting your new dimmer switch, it’s crucial to understand the wiring and the terminal labels on your old switch.
You’ll likely find the following wires:
- Live (hot) wire: This wire carries current to the switch. It’s usually brown in the UK
- Switched live wire: This wire carries current from the switch to the light fitting. It’s often also brown but may have a marker like red tape or a sleeve
- Earth wire: A green and yellow striped safety wire. (Note: In older homes, you might not find this)
- Neutral wire: A blue wire that’s sometimes present in modern installations or required for certain dimmer switches
Switch terminals are usually labelled to show their function. Here’s how to identify the switch terminals:
- COM: This is the common terminal where the live wire connects
- L1: Typically connects to the switched live wire, which carries power to the light fitting
- L2: Used only in two-way switch systems (where two switches control the same light). If your switch isn’t part of a two-way system, this terminal won’t be used
- N: This refers to the neutral terminal on some dimmer switches. It connects the neutral wire.
Before you go any further, take a clear photo of the old switch and wiring. This will help you reconnect everything properly later and help you get back on track if you run into trouble changing your switch.
Step 5: Disconnect the old switch
Unscrew the terminals on the back of the old switch to release the wires. As you disconnect each wire, label it with insulation tape or sleeving (which will stay attached during installation) or jot down its terminal connection (eg. COM, L1, L2) as you go.
As you do this, check for fraying or damage. Stop and consult an electrician if you find a wire in bad condition. Once all wires are disconnected, gently pull the old switch away from the wall box.
Step 5: Connect the wires to the dimmer switch
Examine your dimmer switch. The terminals should be labeled similarly to the old switch. Connect the following wires to the following terminals:
- Connect the live (hot) wire to the COM terminal
- Connect the switched live wire to the L1 terminal
- If your dimmer is part of a two-way switch system, connect the corresponding wire to the L2 Otherwise, leave it empty
- Connect the neutral wire to the terminal marked N (if present)
Step 6: Secure the wires and attach the dimmer switch
Ensure the wires are securely fastened and no exposed wire is visible outside the terminals. You can wrap electrical tape around the connections for extra safety.
Carefully fold the wires back into the wall box behind the switch, ensuring they aren’t pinched or strained. Then, screw the dimmer switch onto the wall.
Step 7: Test the new connection
Switch the power back on at the circuit breaker/fuse box. Test the connection by turning on the dimmer switch and adjusting the brightness.
If the dimmer or lights don’t work after testing, or if you encounter persistent issues like buzzing or flickering, turn off the power and consult an electrician.
Common mistakes to avoid and other important notes
When installing a dimmer switch, avoiding common pitfalls can save time, prevent damage, and ensure a safe, functional setup. Here are some mistakes to steer clear of and important considerations to keep in mind:
- Using non-dimmable bulbs: When paired with a dimmer, these bulbs may flicker, buzz, or fail. Always check for ‘dimmable’ labels on bulb packaging before use.
- Not matching the dimmer to the bulb type: Different types of bulbs (eg. LED, halogen, incandescent) require specific dimmers. For example, standard dimmers may not work well with LEDs, causing flickering or uneven dimming. Always choose a dimmer compatible with your bulb type.
- Overloading the dimmer: Dimmer switches have a maximum wattage capacity, which includes the combined wattage of all connected bulbs. Exceeding this limit can cause overheating or damage to the dimmer. Check the dimmer’s specifications and ensure it can handle the total wattage of your light fixture.
- Overlooking multi-way switch configurations: If your light fixture is controlled by more than one switch (e.g. at the top and bottom of stairs), you’ll need a dimmer switch compatible with multi-way setups. Standard dimmers won’t work properly in these configurations.
- Fitting metal dimmer switch plates to a circuit that isn’t earthed: This can lead to electrical fires, faults, and damage to the bulb, switch, and power supply.
Finally, make sure that:
- Your backbox is deep enough to fit your new dimmer
- You’re not overworking the dimmer by purchasing the maximum wattage light
- You consult the manufacturer’s manual to see if any additional instructions apply to your specific dimmer
When to call in a JustFix professional
Installing a dimmer switch yourself is possible, but it’s not the most straightforward task. If you don’t feel confident identifying and handling wires and connections, it might be better to leave it to a professional. Moreover, if done incorrectly, you could encounter electrical faults leading to fires, electric shocks, or short-circuiting.
Here are some examples of when it’s better to leave it to the experts:
- You’re not confident with electrical work: If you’re unsure about working with electrical wires, a professional can ensure the job is done safely and correctly
- Your home has outdated wiring: Some homes, especially older properties, may have complex or non-standard wiring systems that require specialised knowledge
- You to install multiple dimmer switches: For larger projects where multiple switches are involved, hiring a professional can save time and stress
- You haven’t managed to install your dimmer switch: If you’ve followed the instructions and can’t get your light to turn on or encounter other issues, an electrician can diagnose and fix the problem

Our accredited electricians are experienced in installing dimmer switches. Simply use the JustFix app or website to share a few details about the job, and we’ll connect you with an accredited fixer in your local area.
FAQs about dimmer switches
Do you need special light bulbs for dimmer switches?
Yes, you often need dimmable light bulbs to use with a dimmer switch. Not all bulbs are designed to work with dimmers, and non-dimmable bulbs can cause flickering, buzzing, or even damage the bulb or switch. Bulbs marked as ‘dimmable’ are specifically designed to work with dimmer switches and allow smooth brightness adjustment. LED, halogen, and incandescent bulbs are all available in dimmable options.
Can you use LED bulbs with a dimmer switch?
Yes, but you need to make sure both the dimmer switch and the LED bulbs are compatible. Not all dimmers work with LEDs, so look for switches labelled ‘LED-compatible.’ Similarly, your LED bulbs should be marked as “dimmable.” If your bulb and switch are incompatible, this may result in flickering, buzzing, or a limited dimming range. Always verify the dimmer’s wattage rating to avoid exceeding the maximum load for safe operation.
How do dimmer switches work?
Dimmer switches regulate the amount of electrical current flowing to a light fixture, allowing you to adjust the brightness. Most modern dimmers operate by ‘phase-cutting,’ essentially rapidly turning the current on and off within each electrical cycle. By reducing the time the current is on, the dimmer reduces the total energy reaching the bulb, resulting in lower brightness. Older dimmer switches work by increasing the electrical resistance in the circuit. Modern versions are more energy-efficient and compatible with a wider range of bulbs.
Can you put a dimmer switch on any light?
Not all light fixtures or bulbs are compatible with dimmer switches. The light fixture must be capable of handling variable power input, and the bulbs must be dimmable. Traditional incandescent and halogen bulbs generally work with most dimmer switches, but you’ll need both dimmable bulbs and a compatible dimmer switch for LEDs. Some fixtures, such as fluorescent lights, typically don’t work with standard dimmers. Always check the specifications of your bulbs and fixtures before installing a dimmer switch to ensure compatibility.